
- Airflow Checks: Weak or uneven airflow at supply registers has many causes. Learn simple observations, what they suggest, and when airflow points to a repair, not cleaning.
- Attic Safety: Heat, nails, wiring and weak ceilings make attics risky. See what is safe to view from below, why owners should not climb up and how a technician prepares.
- Camera Inspection: A duct camera lets a technician see inside runs you cannot reach. Learn what footage can and cannot show, and how to treat it as evidence, not a sales tool.
- Check the Filter: The filter is the first and safest check a homeowner can make. Learn how to read it, what a dirty filter does and does not tell you, and when to call.
- Drain Line: Signs of a backed-up AC condensate drain, what moisture near the air handler means, and why it often points away from simple dirt.
- Sweating Ducts: Water beads on registers and duct surfaces are a clear warning sign in humid South Florida. Learn the causes, what to document and what a technician checks.
- Access Points: How technicians get into ducts: existing openings, cut-in access panels, the materials used to close them and what to expect to see afterward in your home.
- Evidence Checklist: A plain checklist of the proof to expect before, during and after a duct cleaning: photos, readings, written notes and answers, so you pay for what was done.
- Insulation Check: rrap and liner condition tell a technician a lot. See what wet, torn or compressed duct insulation means and why it changes the cleaning decision.
- EPA Guidance: A plain reading of public EPA guidance on duct cleaning: when it may be warranted, when it is not routinely needed, and why evidence should come first.
- How Inspection Works: Follow an air duct inspection from the front door to the written findings: what is checked, what is photographed and what you should be shown before any work.
- Reading Photos: Before and after duct photos can prove a job or hide a weak one. Learn how to spot staged, mismatched or low-effort images from any duct cleaning provider.
- HVAC or Duct: An HVAC equipment checkup and a duct inspection look at different things. Learn what each covers, what each misses and which one fits your symptom.
- Your Records: A simple home file for duct work: what to save, how to name photos and reports, and why organized records help with buyers, insurers and future technicians.
- Moisture Readings: Why humidity and moisture readings come before any duct cleaning decision in South Florida, what meters measure, and how a reading changes what a stain means.
- Photo Documentation: Before and after photos are only useful if they are honest. See what a good duct photo set contains, how it is labeled and how to spot a misleading one.
- Cleanliness Check: How to confirm a duct cleaning really happened: visual checks after the work, how industry standards describe verification, and what to look at before you pay.
- Prepare for Visit: A practical checklist for the day of a duct inspection: access to the air handler and attic, pets, valuables and the notes that make the visit smoother.
- Questions to Ask: The questions that bring scope, method and findings into the open while the technician is still at your home, with what a good answer sounds like.
- Sampling or Visual: Compare what a photograph or camera image settles inside ductwork and what lab sampling would add, so you know when a picture is enough and when it is not.
- Leakage Signs: Dirt streaks, loose joints, gaps at boots and disconnected runs are the leak clues an inspector notes. See what they look like and why leaks come first.
- Verify Credentials: How to check a duct cleaning company before it enters your home: questions to ask, public records to look up and insurance paperwork to request.
- Mold or Dust: Dark spots on a register are often dust, not mold. Learn the visual and contextual clues that separate ordinary dust from suspect growth, and their limits.
- Written Report: The sections, photos and plain-language findings a useful duct inspection report includes, and how to tell a real report from a sales sheet before you decide.
- Tools Brought: Cameras, lights, gauges and access tools: what a duct technician carries to an inspection, what each tool is for, and what it can and cannot show you.
- Testing: Learn the narrow cases where air or surface sampling adds value before duct cleaning, who should collect samples, and when a photo and a plain look are enough.
Describe the situation by phone and we will tell you what the job involves. Quotes are given by phone. Jobs that cannot be quoted without seeing them need a technician on site, and the service call charge is explained on the phone before anyone is dispatched.
What a technician looks at first
An inspection starts with the easy things, because they often explain more than expected. The technician looks at the filter, the air handler cabinet, the nearest supply registers and the return grille. They note the color and texture of any dust, whether it is dry and fluffy or sticky, and whether the surfaces nearby look clean or gray. These first impressions set the direction for the rest of the visit and shape which tools come out of the truck. Even a short look often changes the plan for the rest of the visit.
From there, the inspection moves to places where problems like to hide. Inside the air handler closet, the technician may check the drain area, the cabinet seams and the base where the unit meets the platform. In the attic, they look at how the ducts are supported and whether insulation looks wet, flattened or displaced. Each location offers a different kind of clue about what the system has been through. Together, these places give a fuller picture than any single spot can, and the technician connects them into one story about the system.
All of this is explained in plain language as it happens. If you want to follow along, say so. You are welcome to ask what a particular stain or accumulation means, and a careful technician will tell you what they can see and what they cannot, rather than guessing about what lies beyond the opening. That honesty is the difference between an inspection and a sales pitch. You are never obligated to accept a conclusion simply because it was delivered with confidence, and good technicians welcome follow-up questions at any point during the visit.
Tools that let a crew see inside ducts
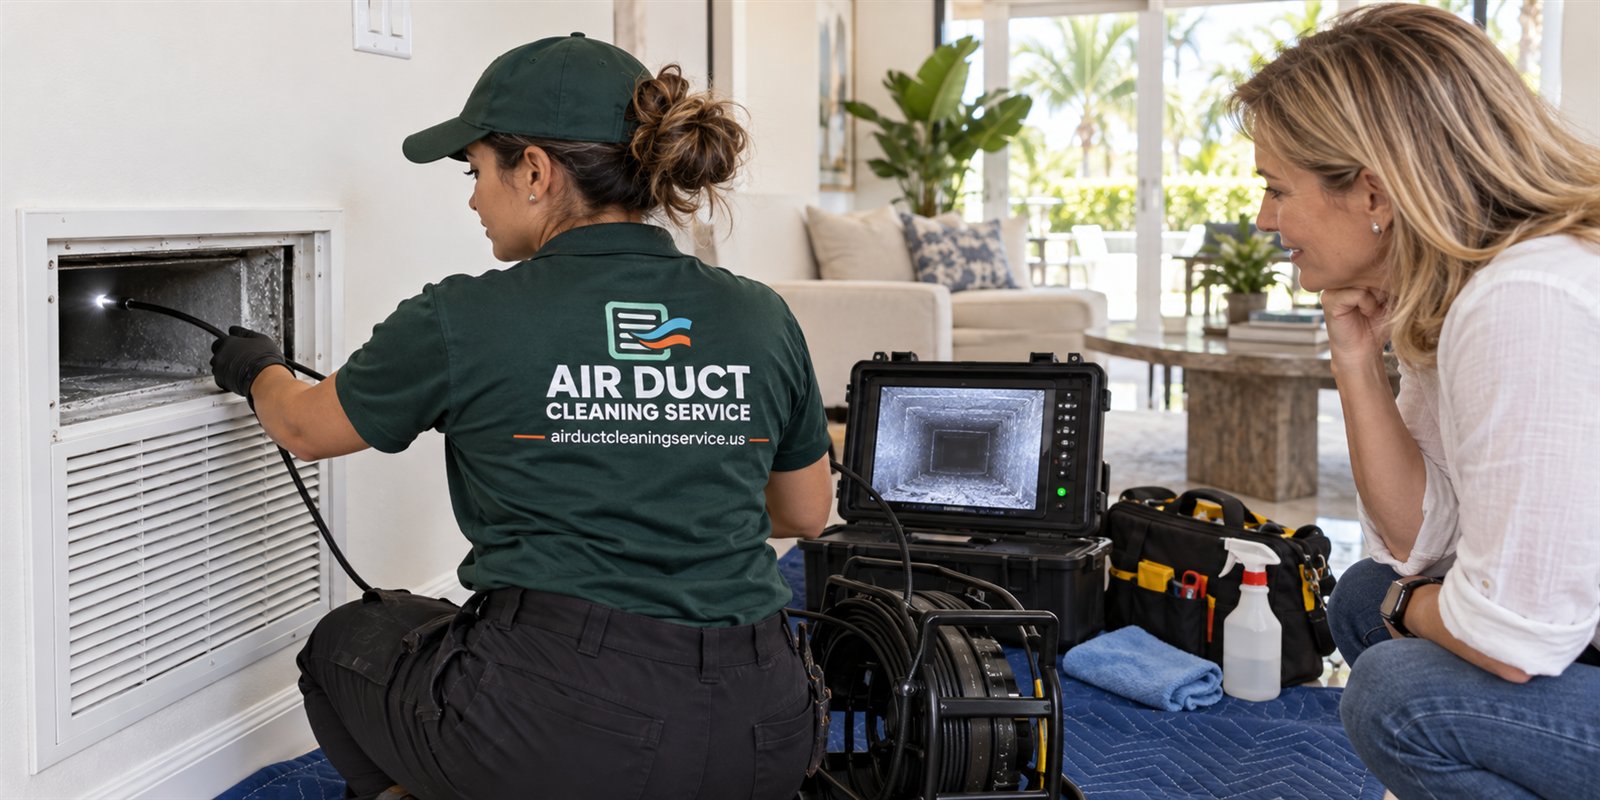
Most of a duct system is out of sight, so inspection relies on tools that extend the technician's eyes. A small camera on a flexible rod can be fed through a register or a small opening to look down a branch. A bright light and a mirror can reveal the inside of a plenum. These tools show what a quick glance cannot, and they allow images to be saved for later discussion with you or with another professional. Pictures and notes taken this way become part of the record you keep afterward.
There are limits. A camera shows only the section it reaches, and long or twisting runs may be only partly visible. Images can look worse or better than reality depending on lighting and angle. Technicians who use cameras carefully will tell you which parts of the system were seen and which were not, so you understand how much the pictures actually cover and how much remains unseen behind the next bend. A fair report says so plainly, because the honest limits of an inspection are part of what you should expect to hear.
If photographs are taken, you can ask to see them on the spot. Good images are specific: they show a location, a condition and enough surrounding detail to make sense of it. Be wary of generic stock pictures that could belong to any house. What matters is what is in your system, and the scope of any follow-up work is explained before it begins so you can decide calmly. Asking to see the image on the screen at that moment, with the technician pointing at what matters, makes the whole thing far easier to follow.
Signs that point toward moisture rather than dust
Dust and moisture can look similar from a distance, but a closer look separates them. Dry dust lifts and smears. Moisture-related buildup tends to feel tacky, appear as dark or discolored patches, or follow the shape of a condensation path. Water stains on insulation, rust on metal fittings and a persistent damp smell near the air handler all point to a moisture question that deserves attention before anything else is decided. Photographs of any stain or discoloration are useful, especially when a small ruler or a coin appears in the frame for scale.
When the inspection suggests moisture, the focus shifts. The technician looks at the drain pan, the condensate line, insulation on cold surfaces and any places where hot attic air meets cold duct. They may also ask about recent storms, roof work or a period when the home was shut up. The goal is to understand where the water is coming from, since cleaning alone does not fix a source that keeps supplying more. Questions about timing help too, such as whether a stain grew after a heavy rain or stayed the same for months.
It is also fair to say when the answer lies outside the scope of duct cleaning. A leaking coil or a failing drain line may call for a different trade. A straightforward explanation of what was seen, and what kind of professional addresses it, is more useful than trying to fold everything into a single job and hoping the result holds up through the next rainy season. Whatever the finding, ask the technician to explain what it means for the rest of the system, not only for the spot where it appeared, so the full picture is clear.
Inspecting vents, dryer lines and exhaust paths
Beyond the main duct system, many homes have vent paths that deserve a look: bathroom fans, kitchen hoods and dryer exhaust lines. These carry lint, grease and humid air, and they follow routes that are easy to forget about. An inspection often includes tracing where each one leaves the building and whether the outlet is clear and the flap moves easily when air pushes against it. Where the exhaust leaves the building, take a look from outside as well, because a cap hidden behind shrubs or a fence often tells its own story about airflow.
The technician checks for kinks, long runs with many turns and flexible material that sags. They look at the exterior cap, where birds, lizards or insects sometimes make homes. They also note whether the connection at the appliance is secure. These are simple checks, but they reveal why a dryer may take a long time to finish a load or why a bathroom stays damp long after a shower. A dryer that must be run twice, a bathroom mirror that stays fogged and a kitchen that holds cooking smells are all small signals worth mentioning during the visit.
If a problem is found, the explanation covers the options and what each involves. Cleaning may be appropriate, or the path may need rerouting or repair by someone else. Either way, the scope is spelled out before work begins, and you decide what makes sense for your home and for the time and attention you want to put into it. Nothing is done on assumption. A well-run inspection treats these side paths with the same care as the main ducts, because they share the building and often share the same causes of trouble.
How findings are recorded and shared
A good inspection produces a record, not just an impression. That might include a short written summary, a handful of photographs with captions and notes on what was and was not seen. The record lets you compare conditions over time, share information with a landlord or association, or consult another professional without repeating the whole process from the beginning and paying attention to the same details twice. Ask whether the notes will be written by hand or typed, and whether photographs will be labeled by room, so that you can find what you need quickly later.
Quality of detail matters more than quantity. A single clear photograph of a damaged joint with a note about its location is worth more than a dozen blurry images. Notes should distinguish between what was observed directly and what is an inference. If the technician says that a section looks like it may have had moisture, that is different from confirming it, and the wording should reflect that difference honestly. Specific wording protects you from misunderstandings months later, when memory fades and the person who wrote the note may not be available to explain it.
Ask how you will receive the information and whether you can keep it. Condo boards, property managers and others sometimes ask for documentation, and having it organized saves time later. You are entitled to understand what was found in terms you can repeat to someone else, and to ask for clarification whenever a note or a picture does not make sense to you. If a condo association or property manager asks what was found, you can hand over a clean, honest summary instead of trying to recall details from a conversation that happened weeks earlier, which keeps things simpler for everyone involved.
Questions worth asking during an inspection
You do not need technical vocabulary to ask good questions. Start with simple ones: What did you see? Where exactly? Is it a concern now, or something to watch? What would happen if nothing is done? How would you approach it, and what would you leave alone? Clear answers to these tell you most of what you need to make a decision, and they work equally well for a small apartment or a large house. These questions open the conversation naturally without turning it into an interrogation or a test of the technician.
It is also reasonable to ask about the technician's limits. Are there parts of the system that cannot be reached? Is there anything that should be checked by a specialist? How confident are they in the conclusion? Honest answers include uncertainty where it exists, and a technician who says I cannot tell from here is being more helpful than one who sounds sure about everything and never admits a doubt. That honesty is also what lets you trust the parts of the report that are stated with confidence, because you have seen how doubt is handled.
Finally, ask what happens next. If work is recommended, what is the scope, how will access be made and how will the system be left afterward? Those details are explained before work begins, and you can take your time. An inspection is a way to gather information, not a commitment to proceed, and you can say thank you and decide later without any pressure from the crew. If you would like time to think, say so, and ask for the written summary so you can review it with family or a property manager before replying.
Preparing your home for an inspection visit
A bit of preparation makes the visit smoother. Clear the area around the air handler and any attic hatch, move cars or storage that block garage access and make sure the technician can reach the main return and a few supply registers. If the property has a gate, a key box or a concierge desk, arrange access in advance so that time is not lost standing at the door waiting for someone to let the crew in. Small steps like these remove friction and make the technician's time more useful to you.
Gather basic information, too. Knowing roughly how old the system is, when the filter was last changed and whether any repairs or renovations have taken place helps the conversation. If you have noticed odors, noises or uneven cooling, jot down when they occur. If you have photos of stains or problem areas, keep them handy on your phone so they can be shown right away. If you keep a file or folder for the house, add the age of the system, the model label from the air handler and a few photographs, since these basics answer many questions at once.
Think about pets and household routines. Animals are often anxious around strangers and equipment, so a quiet room for them is kind. If someone in the home is sensitive to dust or strong smells, mention it up front. Planning ahead keeps the visit focused on the system rather than on logistics, and it leaves more time for the questions that really matter to you. It also helps to decide beforehand who will be home and who can answer questions, so that decisions about access or scope are not delayed by someone who is unreachable.