
Why proof matters more than promises
Most of a duct system sits inside walls, ceilings and attics. You cannot walk past it and check the work the way you would check a freshly painted room. That makes duct cleaning one of the few services where the customer depends almost entirely on what the provider says and shows. Evidence closes that gap. When there are dated photographs, written notes and a clear description of what was cleaned, you no longer have to rely on trust alone.
Evidence also protects honest providers. A technician who documents the job properly can show exactly what was found and exactly what was done, which settles later questions about whether a stain returned, whether a duct was reached or whether the system was left in good condition. Good records work in both directions.
The checklist below is organized by time: before you agree to anything, during the visit, and after the work. You do not need to carry it to the door like an auditor. Reading it once will tell you what a normal, well-run job looks like, and anything that is missing becomes easy to notice. A fuller walk through the visit itself is in how a duct inspection works.
Before you agree to any work
The first evidence is the conversation. When you describe your concern, the person on the phone should ask questions: what you have noticed, where, since when, what type of system you have, whether there has been water in the home recently. They should explain that an inspection comes first and that the cleaning scope depends on what is found. They should tell you that quotes are given by phone, or after an on-site look if the job cannot be quoted without seeing it, and that the service call charge is explained before anyone is dispatched.
You should also be able to learn, before the visit, what the technician will bring and how long a typical inspection takes in general terms. If you are told that cleaning is certain before anyone has seen the system, treat that as a warning. If you are told the job will cost a fixed amount without any questions about the home, treat that the same way.
- A clear explanation that inspection comes before any cleaning decision
- Questions about your system type, home age, symptoms and recent water events
- An explanation of how the quote and the service call charge work, given by phone
- A named person or company you can verify, with credentials you can check yourself
- No claim that cleaning cures illness or fits a fixed schedule for every home
At the start of the visit
When the technician arrives, the first evidence should be identification and a short walk-through of the plan. You can ask to see how they are identified and what the visit will include. They should note the type of system, the location of the air handler, the number of returns and supply registers, and the approximate layout. A good technician will also ask permission before opening anything, moving furniture or entering the attic.
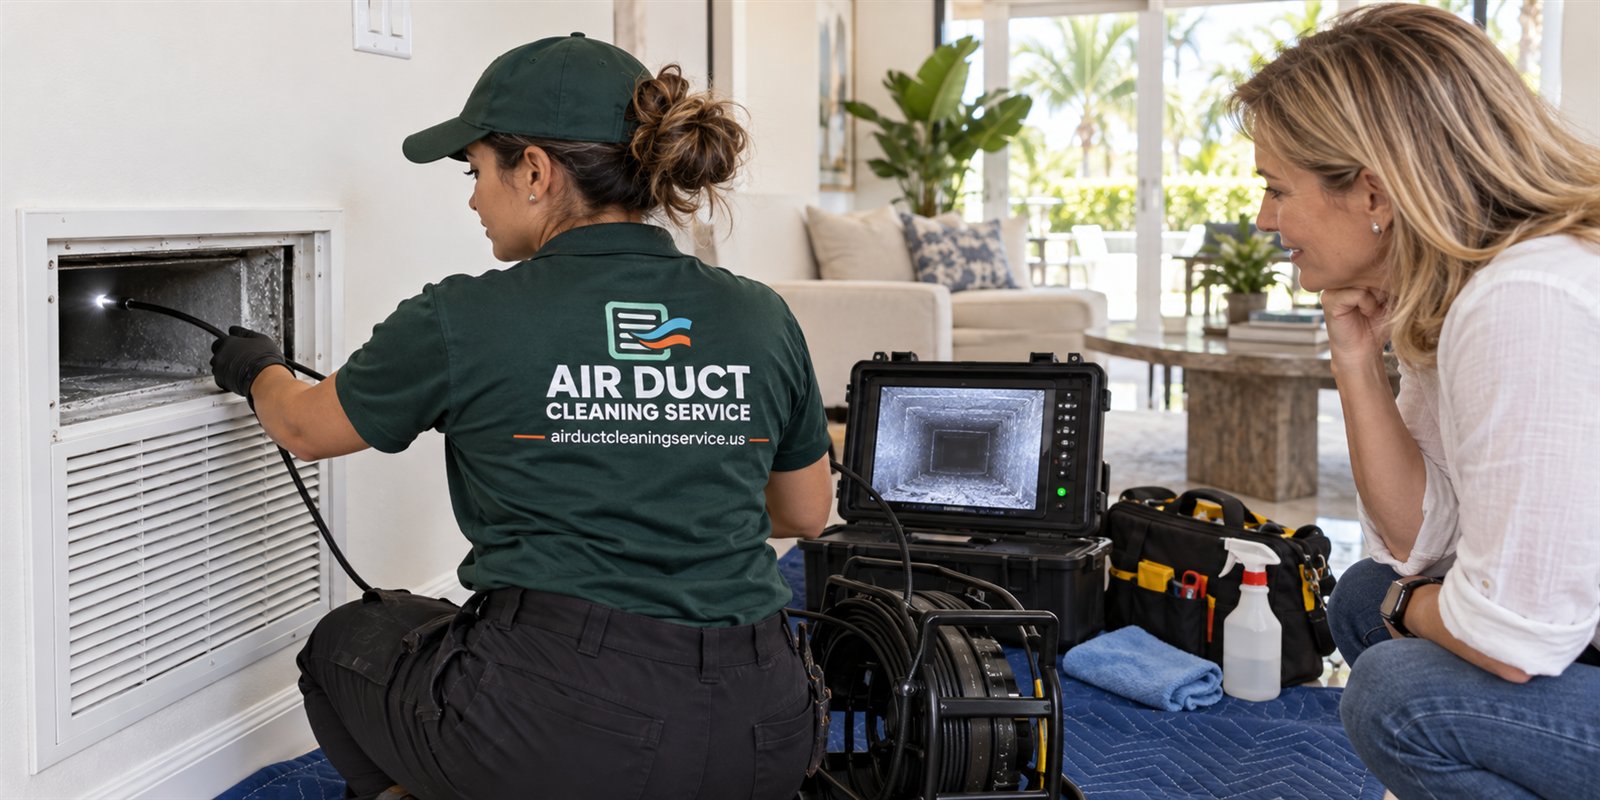
Ask where they will take photographs and whether you can see them as they are taken. Many modern inspection cameras show a live image on a small screen, and you can look at it with them. This is the single easiest way to build your own confidence, because you are seeing the interior of the system at the same time the technician is.
Before the work begins, expect the technician to protect floors and furniture near the equipment, to turn off the system when required, and to explain what will be disturbed. If the home has a known issue, such as a leaking drain or a ceiling stain, mention it now so that it ends up in the notes.
Inspection evidence you should receive
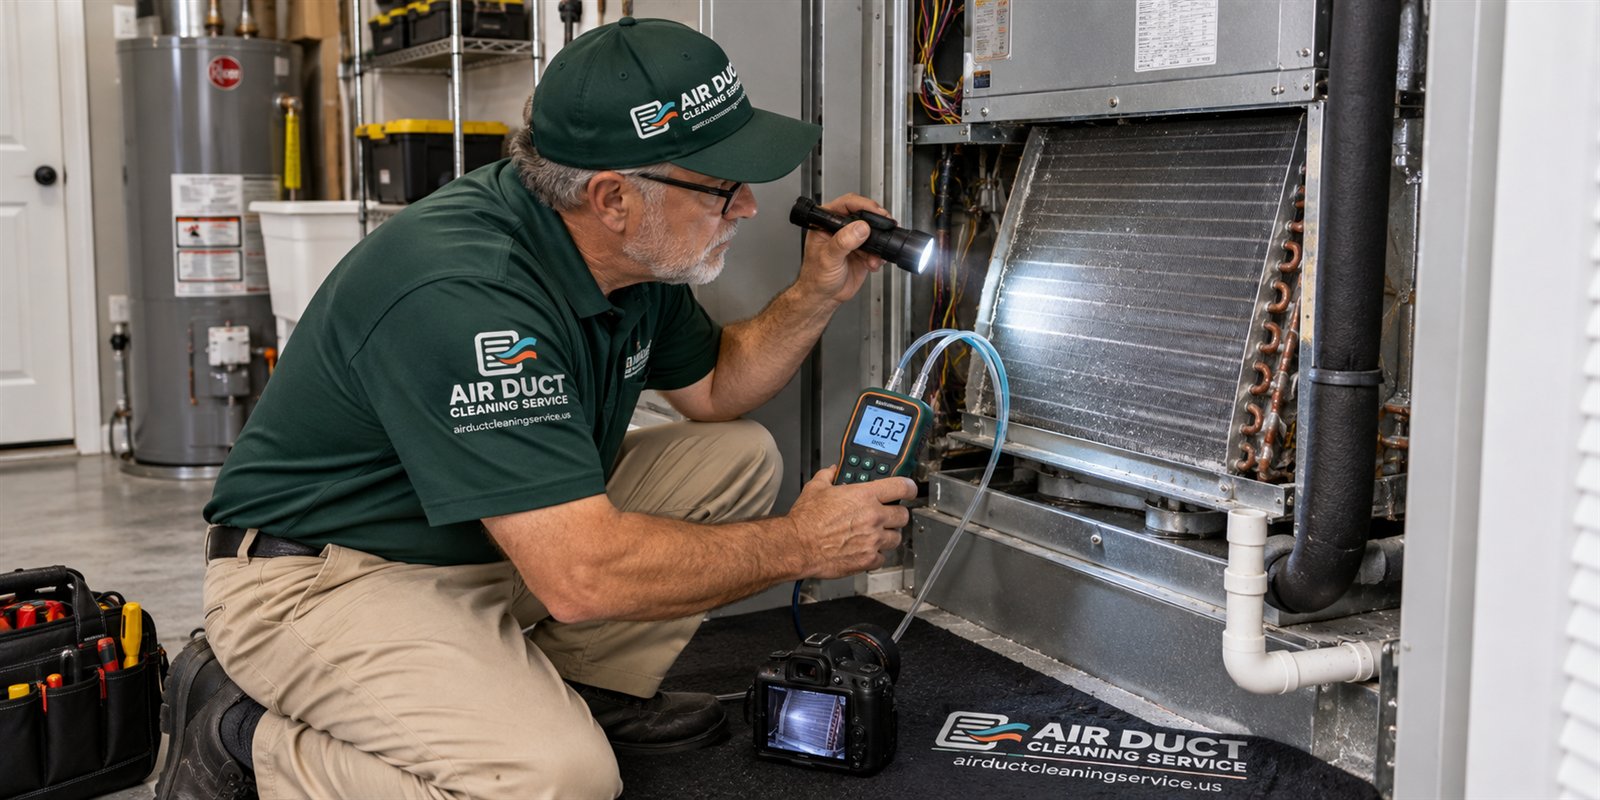
The inspection stage should produce a short list of items you can see or read. Photographs are the core. They should include the filter and its housing, the area around the air handler, a sample of supply and return registers, and the inside of the ducts where access allows. Each photo should be tied to a location so that you can tell which register or section it shows.
Where moisture is possible, a reading from a moisture meter or a humidity reading should be taken and noted, since moisture changes what a stain or odor means. Details about this are in moisture and humidity readings in ducts. If something concerning is found, such as damaged insulation or a disconnected run, it should be photographed and described in plain words, not buried in jargon.
- Photo of the filter and filter slot, showing size and condition
- Photo of the air handler area, including the drain pan and drain line where visible
- Photos of at least a few supply and return registers, labeled by room
- Camera images from inside representative duct sections, with location noted
- Moisture or humidity readings where there is any sign of dampness
- A plain-language note for each concern found, saying what it is and what it means
- A clear statement of what was not reached or could not be inspected
What a trustworthy scope looks like
After inspection, the technician should tell you whether cleaning is recommended, and if so, which parts of the system. A scope is more than the words whole system. It should list the pieces: supply branches, return runs, plenums, the blower compartment, the coil if accessible, registers and grilles. If something is excluded because it cannot be reached or because it is damaged, that should be said out loud and written down.
A trustworthy scope also explains what the technician did not find. If the ducts looked clean, you should be told that and shown why. If the problem is a wet drain pan, a loose joint or a filter that does not fit, you should hear that cleaning will not fix it and that a different repair comes first. Some homes leave the visit with no cleaning scheduled at all, and that is a good outcome, not a failed sale.
Quotes are given by phone or after an on-site visit, and nothing should begin until you have seen the evidence and agreed. For decisions around timing and risk, the page on questions to ask during the visit lists plain questions to use at this point.
Evidence during the cleaning itself
While work is under way, you will not see everything, but you should see enough. Expect the technician to explain the method in simple terms: how the system is placed under negative pressure or otherwise contained, how debris is agitated and captured, how access openings are made and later closed, and how fragile components are protected. You should not be asked to leave the home for the entire visit unless there is a specific reason that is explained.
Ask whether the technician will take a mid-job photograph of any section that is unusual, such as a heavily loaded return or a damaged liner. A single photo taken during the work can explain a lot later. If an unexpected problem appears, such as a collapsed flex duct, loose insulation or an active leak, the technician should stop, show you, and explain the options before continuing.
Watch for what should not happen. Registers should not be left lying in a garage or on the lawn. Debris should not be blown into the home. Access cuts should not be left unclosed. Any damage to a component should be reported immediately. These are ordinary professional standards, and a technician who follows them will not object to your asking about them.
Evidence after the work is finished
At the end of the job you should receive a before and after record. This means photographs of the same locations taken before and after the work, so you can compare them directly. The page on how to read before and after photos explains what to look for, including lighting and angle differences that can make a comparison misleading.
You should also expect a written summary of what was cleaned, what was found, what was not reached and what, if anything, is recommended next. If a repair is needed, such as sealing a joint or fixing a drain, it should be described separately from the cleaning so that the two are not confused. Any access openings should be shown closed and sealed.
Finally, ask how the system is returned to normal. The filter should be correct and seated. The system should be turned back on and observed running. Registers should be back in place and secure. These little steps are part of the evidence that the job is finished and not simply stopped.
- Before and after photos of the same locations, labeled
- Written summary of what was cleaned and what was not reached
- Separate notes on any repair needs, not mixed into the cleaning
- Confirmation that access openings were closed and sealed
- Confirmation that the filter, registers and system were restored and run
Evidence you can collect yourself
You do not have to depend on the provider alone. Before the visit, take your own photographs of registers, the filter and any stains, with the date visible on your phone. After the visit, take them again from the same positions. Keep your own notes of what time the technician arrived, what they said, and what you were shown. These habits take ten minutes and can matter greatly if a question ever comes up.
Keep everything together in one place. A folder on your phone, or a printed sheet in your home files, is enough. For landlords, property managers and condo boards, the page on keeping your own duct records suggests a simple structure so that each unit's history can be found later.
If you have a concern after the job, such as a smell that returns or a register that looks the same, compare your own before and after photos with the provider's before calling. That way the conversation is about specific evidence rather than general impressions.
Evidence for different kinds of properties
The same checklist bends a little depending on the building. In a single-family home with an attic air handler, the key proof is usually a pair of photographs of the attic equipment area plus camera images of the main trunk, since attic ducts see the most heat and the most chance of damaged wrap. In a block of condominiums, evidence should be recorded unit by unit, because ducts, drain lines and returns often differ from one floor to the next, and one unit's condition says little about its neighbor.
In a rental turnover, the evidence should be dated and kept by the owner or manager so that the condition at move-in and at move-out can be compared. In a small commercial space, the proof should include the equipment tag information and the location of every access point, since several tenants may share one system over the years.
Homes with a mini-split or other ductless equipment need a different checklist, since there are no ducts to photograph. The indoor unit, its drain and its filter become the focus. The page on mini-split systems and cleaning covers what proof makes sense there.
After a storm or a leak, add one more item: a note of the date of the water event and what was done about it. Moisture history changes how every other photograph should be read, and a technician who knows about it can describe the findings more accurately.
Questions that produce better evidence
Evidence often depends on what you ask for. A technician who is never asked for photographs may not think to take them, while one who knows the customer wants them will plan the visit around them. The most useful single habit is to say at the start that you would like to see what is found as it is found, and to receive photographs afterward.
A few other questions improve the quality of what you get. Ask which parts of the system will be photographed. Ask whether the same locations will be shot again after the work. Ask how access openings will be made and sealed. Ask whether anything may be found that would change the plan. Ask what happens if something is found that was not expected, and who decides what to do. Each of these gets a concrete answer you can write down.
Ask also what would make the technician stop. A professional will say that active water, damaged insulation, suspected hazardous material or unsafe attic conditions would pause the work until the issue is addressed. Knowing this ahead of time prevents disagreements later and shows that the provider has thought about the limits of the job.
These questions are not meant to be adversarial. They tell the provider that you value careful work, and most careful providers appreciate that. The ones who object to showing you what they are doing are telling you something important as well.
Printable list and what to do if items are missing
Here is the whole checklist in short form. Missing one item does not mean something is wrong, because some homes simply do not allow access to every location. But missing several items, particularly photographs and written notes, is a reason to pause and ask questions before paying.
If something is missing, ask politely for it. A professional can usually send photographs or written notes after the visit. If a provider will not share evidence of the work you paid for, that tells you something about how the work was done. In that case it is reasonable to stop, keep what you have, and consider a second opinion before agreeing to further work.
If you would like to talk through your own situation, call and describe what you have noticed. The conversation covers how an inspection is scheduled, how quotes are given by phone, and how the service call charge is explained before a technician is sent.
- Before: clear explanation, questions asked, quote process described
- Arrival: identification, plan, permission, system and layout noted
- Inspection: filter, air handler, registers and duct photos with locations
- Inspection: moisture readings where needed, plain notes on concerns
- Scope: listed parts, exclusions stated, no cure or schedule claims
- During: method explained, surprises shown and discussed
- After: matched before and after photos, written summary, repair notes
- Close: access sealed, filter correct, system run and observed
Questions people ask
What is the single most important item to ask for?
Dated before and after photographs of the same locations, each labeled with where it was taken. Photographs let you see the condition yourself rather than rely on description. If a provider cannot or will not give you photographs of the work you are paying for, ask why before you agree to anything else.
Can I watch the technician work?
Generally yes, within reason and safety. You can look at the inspection camera screen with the technician and ask to see any area that is unusual. You may be asked to keep clear of equipment and attic access for safety, but you should not be kept in the dark about what is found.
What if some ducts could not be reached?
That happens, particularly in tight attics or enclosed chases. The provider should tell you which sections were not reached and why, and record it in writing. Do not assume that unreached sections were cleaned. Ask what options exist, including additional access, and whether they are worth pursuing for your system.
Should the report mention repairs separately?
Yes. Cleaning and repair are different jobs with different purposes. A loose joint, wet insulation or a slow drain should be described on its own so you can decide about each. Mixing them into one line makes it hard to know what you are paying for.
Is a verbal summary enough?
A verbal summary is useful, but written notes are better because they can be saved and compared later. Even a short written list of what was cleaned, what was found and what was recommended is valuable. Ask for it by email or on paper before the technician leaves or soon after.
What if the before and after photos look similar?
Similar photos can mean the ducts were not very dirty, or that the photos were taken at different angles or lighting. Ask the technician to explain what each photo shows and where it was taken. If the ducts were already clean, a good provider will say so honestly rather than claim a dramatic change.
Describe the situation by phone and we will tell you what the job involves. Quotes are given by phone. Jobs that cannot be quoted without seeing them need a technician on site, and the service call charge is explained on the phone before anyone is dispatched.
Related pages
- How Inspection Works: Follow an air duct inspection from the front door to the written findings: what is checked, what is photographed and what you should be shown before any work.
- Photo Documentation: Before and after photos are only useful if they are honest. See what a good duct photo set contains, how it is labeled and how to spot a misleading one.
- Reading Photos: Before and after duct photos can prove a job or hide a weak one. Learn how to spot staged, mismatched or low-effort images from any duct cleaning provider.
- Your Records: A simple home file for duct work: what to save, how to name photos and reports, and why organized records help with buyers, insurers and future technicians.
- Leakage Signs: Dirt streaks, loose joints, gaps at boots and disconnected runs are the leak clues an inspector notes. See what they look like and why leaks come first.
- EPA Guidance: A plain reading of public EPA guidance on duct cleaning: when it may be warranted, when it is not routinely needed, and why evidence should come first.